Stainless steel cookware is durable, hygienic, and surprisingly easy to damage through careless cleaning. Burnt oil, cloudy mineral marks, and rainbow heat stains can make a polished pan look permanently ruined. Often, it is not ruined. The correct method usually needs gentle tools, controlled heat, and patience.
Understanding how to clean stainless steel cookware properly protects both appearance and performance. The U.S. Department of Agriculture recommends washing food-contact cookware with hot, soapy water and allowing it to dry thoroughly. The World Stainless Association also identifies stainless steel as a durable and highly recyclable material, which supports longer product use instead of unnecessary replacement. However, durability does not mean unlimited resistance. Chloride-rich cleaners, abrasive pads, and prolonged salt exposure may contribute to pitting or surface damage.
A practical cleaning routine begins with cooling the pan slightly, removing loose residue, and using warm water with mild dish soap. For stuck food, simmering water briefly can soften the layer without aggressive scraping. A soft sponge is usually safer than steel wool. Vinegar may help with mineral film, but it should never replace careful rinsing and drying. Small details matter.
Real kitchens are less predictable than laboratory demonstrations. I have seen clean-looking pans develop marks after rushed drying or excessive heat. That experience deserves attention, not embarrassment. This guide explains professional, evidence-informed methods for restoring stainless steel cookware while recognizing their limits. Some stains may remain faintly visible, and that is not always a cleaning failure.
Before cleaning stainless steel cookware, inspect its condition under good light. A dull rainbow stain is usually harmless heat discoloration, while black, raised residue needs gentler attention. Check for deep scratches, pitting, loose handles, or a warped base. These defects may affect safe cooking, not just appearance.
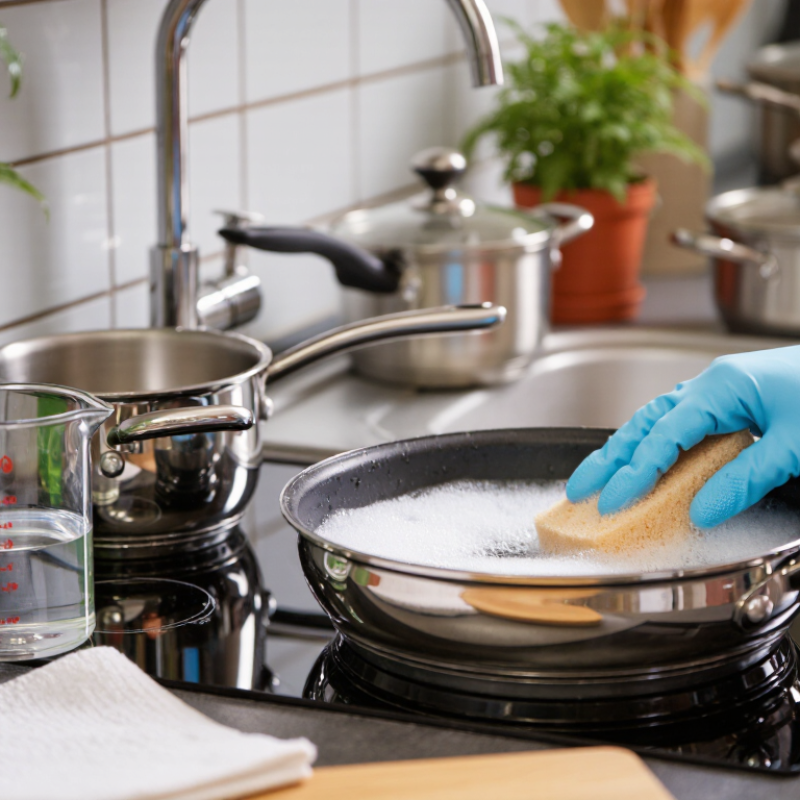
Let the pan cool naturally before washing it. Sudden cold water can distort hot metal. I usually fill the cookware with warm water and a small amount of mild dish soap, then wait ten minutes. A soft sponge, microfiber cloth, or nylon cleaning pad is suitable for daily marks. For baked-on food, use a wooden or silicone scraper. It should lift residue without cutting the surface. A paste made from baking soda and water can help with stubborn spots. Test it on a small area first.
Avoid steel wool, abrasive powders, and sharp metal tools. They can leave tiny grooves where food residue collects. Chlorine-based cleaners and strong oven products may also damage the finish or leave unwanted residues. Wipe in the direction of the steel grain when visible. Rinse thoroughly, then dry immediately with a clean towel to reduce water spots. I once polished too aggressively and created a cloudy patch, so more pressure is not always better. If pitting is extensive or the cooking surface feels rough, cleaning may no longer solve the problem. Consider replacing the cookware after careful assessment.
| Cookware Condition | What to Look For | Recommended Cleaning Tools | Suitable Cleaning Method | Tools or Practices to Avoid |
|---|---|---|---|---|
| Light daily residue | Small amounts of food, grease, or water spots with no burnt areas. | Warm water, mild dish detergent, soft sponge, and a clean microfiber cloth. | Allow the cookware to cool slightly, wash with warm soapy water, rinse thoroughly, and dry immediately. | Do not use steel wool, harsh scouring powder, or a dirty sponge that may leave abrasive particles. |
| Dried-on food | Food remains are firmly attached but the metal surface is not discolored or damaged. | Warm water, mild detergent, a non-abrasive nylon pad, and a wooden or silicone utensil. | Soak for 15–30 minutes. Loosen the residue gently, then wash and rinse without forcing the surface. | Avoid scraping with knives, forks, or other sharp metal objects. |
| Brown or rainbow discoloration | Heat tint, mineral film, or colored patches after heating or repeated washing. | Diluted white vinegar, a soft sponge, clean water, and a microfiber cloth. | Apply diluted vinegar briefly, wipe gently, rinse well, and dry completely. Follow the cookware manufacturer’s care instructions when available. | Do not leave acidic solutions on the surface for extended periods or mix vinegar with chlorine bleach. |
| Burnt-on or blackened residue | A thick, dark layer remains after ordinary washing. | Baking soda, water, a soft or non-abrasive nylon pad, and a wooden spatula. | Cover the residue with water, add baking soda, simmer gently if the cookware allows it, cool, and lift the softened residue carefully. | Avoid sudden temperature changes, aggressive grinding, and abrasive metal pads. |
| White mineral deposits | Chalky white spots or rings caused by mineral-rich water. | Diluted white vinegar or citric-acid solution, a soft cloth, and clean water. | Wipe the deposits with the diluted solution, rinse thoroughly, and dry the cookware to prevent new spots. | Do not use undiluted acid for prolonged contact or combine different chemical cleaners. |
| Surface scratches | Visible lines or scuffs caused by abrasive tools or utensils. | Soft sponge, mild detergent, and a microfiber cloth; use only products specifically labeled as safe for stainless steel if polishing is necessary. | Clean gently in the direction of the existing grain or finish, then rinse and dry. | Avoid steel wool, wire brushes, coarse scouring pads, and circular scrubbing on brushed finishes. |
| Possible corrosion or pitting | Rust-like spots, pinholes, rough areas, or damage that remains after cleaning. | Soft cloth and mild detergent for light cleaning; professional assessment for deep pitting or structural damage. | Stop aggressive scrubbing, clean gently, dry thoroughly, and inspect the cookware before further use. | Avoid chlorine bleach, salty residue left on the surface, and prolonged contact with strong cleaners. |
| Routine maintenance | The cookware is clean but needs to remain spot-free and in good condition. | Mild detergent, soft sponge, warm water, and a dry microfiber cloth. | Wash after use, rinse away detergent and salt, dry promptly, and store only when completely dry. | Do not leave food, salt, acidic liquids, or standing water in the cookware for long periods. |
Safety note: Always check the cookware’s care instructions before using a cleaning method. Test any new cleaner on a small, inconspicuous area first, and never mix cleaning chemicals.
Wait until the pan is warm, not scorching hot. Use a wooden or silicone scraper for rice, sauce, and browned bits. Do not rush.
Add warm water and a small amount of mild dish detergent. Soak the cookware for five to ten minutes. Clean with a soft sponge.
Follow the visible grain of the steel. This reduces noticeable marks and helps preserve the surface. Scrubbing against it may look harsher.
It may remove food quickly, but it can leave fine scratches. Those scratches may trap residue later. I used one before. I regret it.
Cover the base with warm water and simmer briefly. Turn off the heat and let the pan cool. Loosen the softened food gently.
It is better to avoid long soaking. Standing water and dried detergent may create dull marks. A short soak usually works better.
Run clean water over every surface until there is no foam, scent, or slippery film. Check the rim, rivets, handle joints, and underside.
Dry the base, sidewalls, handles, rivets, and hidden edges with a clean, lint-free towel. Moisture can leave mineral spots or encourage surface corrosion.
Avoid sudden temperature changes. Let the pan cool slightly before adding warm water. Cold water can shock the metal and possibly distort it.
Let it cool completely before storing. Keep pieces from stacking while wet, and leave space for air circulation. A dry pan is not finished until every edge feels dry.
Learning how to clean stainless steel cookware properly begins with checking its condition and selecting safe tools, such as a soft sponge, microfiber cloth, and non-abrasive cleaner. Remove loose food first, then wash the surface with warm water and mild dish soap, following the grain of the steel when possible. Avoid harsh scouring pads or sharp tools that may leave scratches.
For burnt stains, grease, or discoloration, use a gentle soaking method and a suitable stainless steel cleaning solution, allowing residue to soften before wiping it away. Rinse the cookware thoroughly to remove all cleaner residue, then dry every part completely to help prevent water spots and marks. Finally, polish the surface with a clean, soft cloth, inspect it for remaining stains or damage, and store it in a dry place with protection between stacked pieces. These simple habits help preserve the cookware’s appearance, cleanliness, and performance over time.

